最近入手一块NVIDIA Tesla P100-16G,用来学习模型微调。模型跑得也挺快,特好用,也算是进入低配玩转AI了。接下来就来简单讲解一下如何训练模型了。由于ChatGLM3-6B对中文支持较好,也不像Qwen有这么多各种7B、14B等等的版本,那么首先就用ChatGLM3-6B进行训练测试了。
下载训练框架
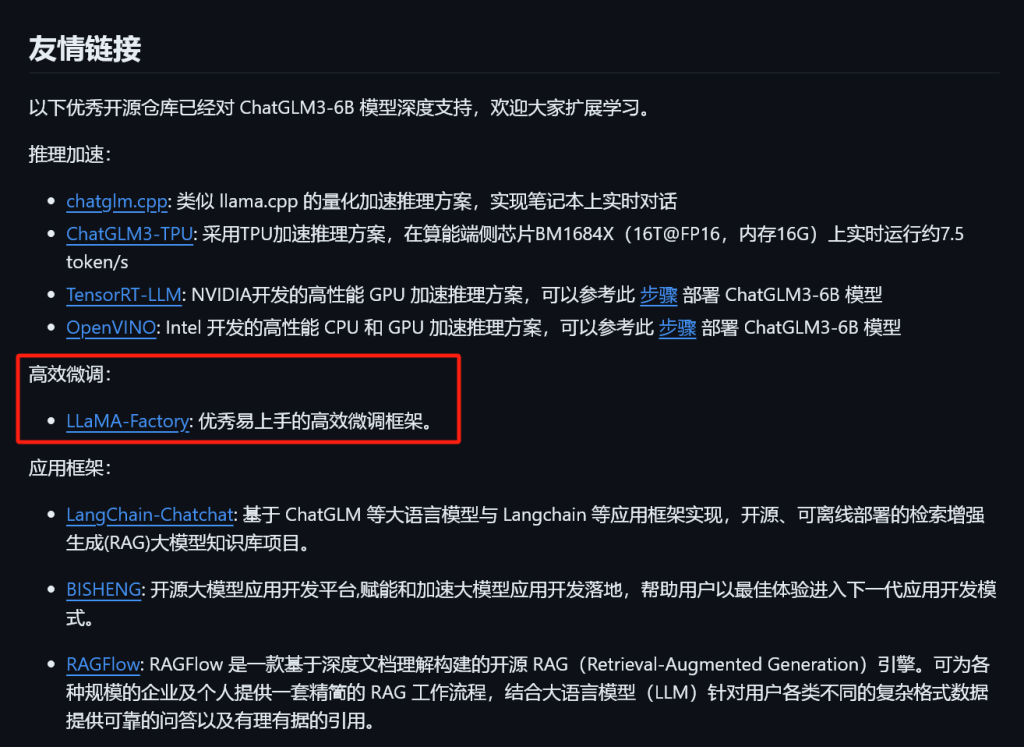
在ChatGLM3的GitHub上推荐了高效微调的框架:LLaMA-Factory,那么我们就用它。
可以根据README_zh.md中看到,安装框架的方法,这里用首先克隆仓库,然后安装pip包,这里国内推荐用清华的镜像源:
git clone --depth 1 https://github.com/hiyouga/LLaMA-Factory.git
cd LLaMA-Factory
## 随后创建独立的Python虚拟环境,便于管理,再安装pip包
pip install -e .[torch,metrics] -i https://pypi.tuna.tsinghua.edu.cn/simple
pip install -r requirements.txt -i https://pypi.tuna.tsinghua.edu.cn/simple

## 卸载cpu版本的torch并下载对应版本的cuda-torch:
pip uninstall torch torchvision torchaudio
## 因为我用的是最新版grid驱动,538.46,cuda12.2,因此用cu118:
pip install torch torchvision torchaudio --index-url https://download.pytorch.org/whl/cu118
运行LLaMA Board:
然后单卡训练可以直接运行图形可视化网页版的界面,运行没问题的话会用默认浏览器自动打开http://localhost:7860:
python .\src\webui.py

## 输出结果:
2024-05-28 21:01:43.131183: I tensorflow/core/util/port.cc:113] oneDNN custom operations are on. You may see slightly different numerical results due to floating-point round-off errors from different computation orders. To turn them off, set the environment variable `TF_ENABLE_ONEDNN_OPTS=0`.
2024-05-28 21:01:44.196141: I tensorflow/core/util/port.cc:113] oneDNN custom operations are on. You may see slightly different numerical results due to floating-point round-off errors from different computation orders. To turn them off, set the environment variable `TF_ENABLE_ONEDNN_OPTS=0`.
Running on local URL:  http://0.0.0.0:7860

To create a public link, set `share=True` in `launch()`.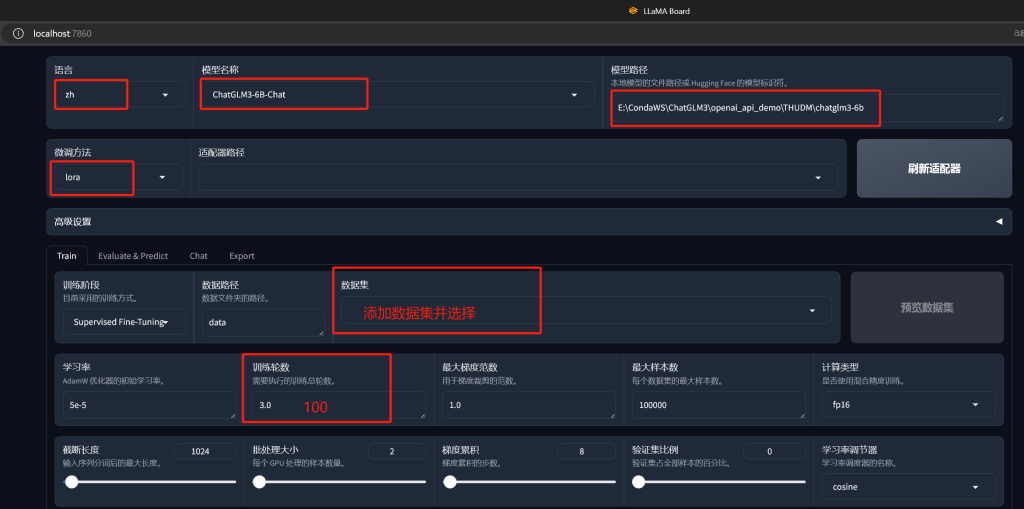
修改中文语言直观方便
修改模型为ChatGLM3-6B-Chat
修改模型路径(这篇文章中有详细的下载模型方法:【Tip】Win部署ChatGLMx-6B遇到的坑和部署流程 – iTPno.)
修改微调方法为lora
添加数据集
修改训练轮数
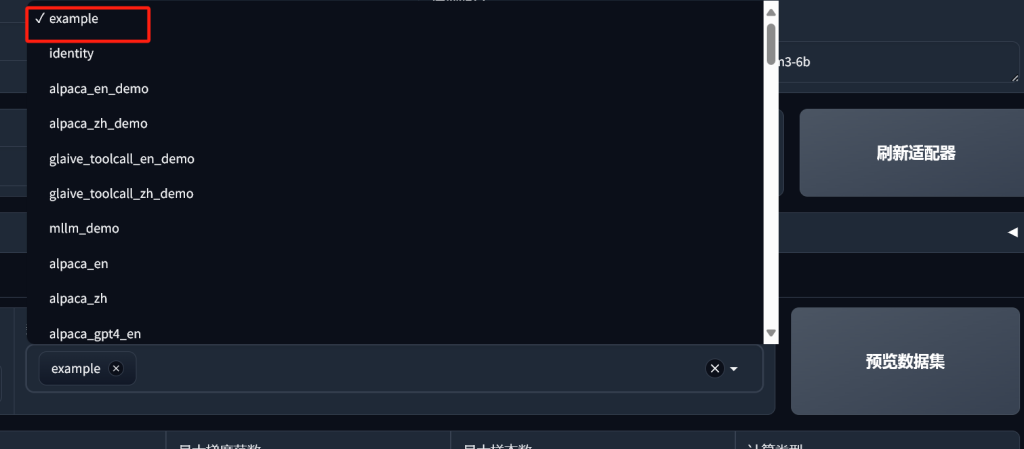
添加训练数据集
这里介绍的是最简单的指令数据集。
修改LLaMA-Factory下的/data/dataset_info.json,在json中添加一个数据集,可以在/data/README_zh.md中看到数据集的例子为:
"数据集名称": {
  "file_name": "data.json",
  "columns": {
    "prompt": "instruction",
    "query": "input",
    "response": "output",
    "system": "system",
    "history": "history"
  }
}
那么我们就可以添加一个:
{
  ...
  "example": {
    "file_name": "example.json"
  },
  ...
}
然后在/data/下创建example.json文件,添加以下数据集:
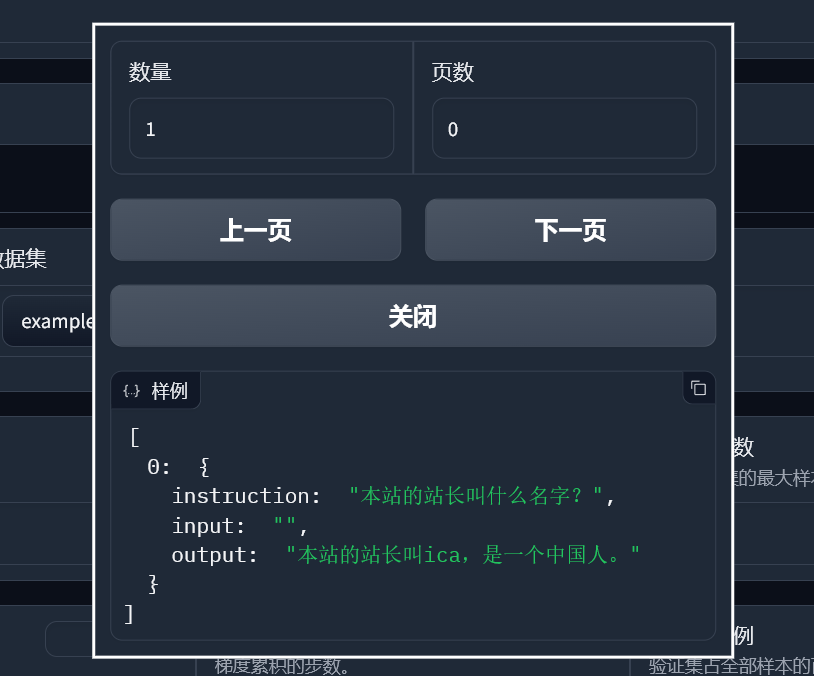
[
  {
    "instruction": "本站的站长叫什么名字?",
    "input": "",
    "output": "本站的站长叫ica,是一个中国人。"
  }
]
随后,我们刷新LLaMA Board,看到数据集名称和预览文本:
训练模型
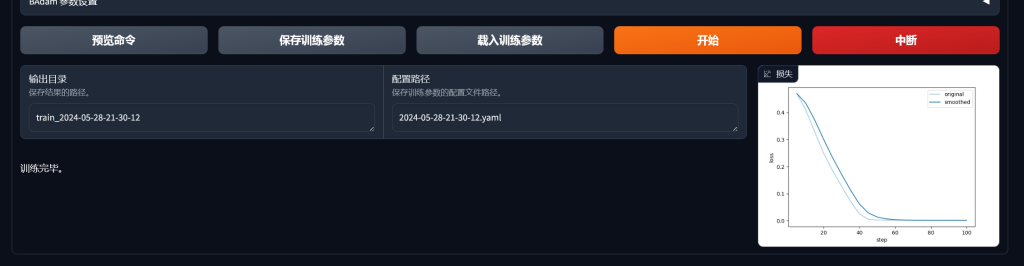
由于之前用3.0、50.0的训练总轮数测试了结果,并不理想,并直接将数值改为100.0,一条数据的时间不过26秒,很快完成了。
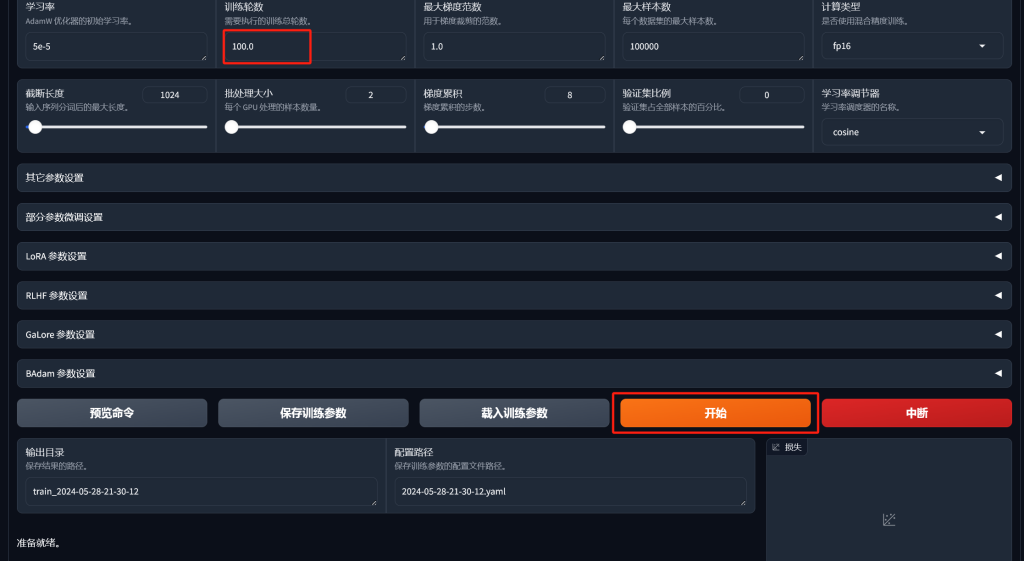
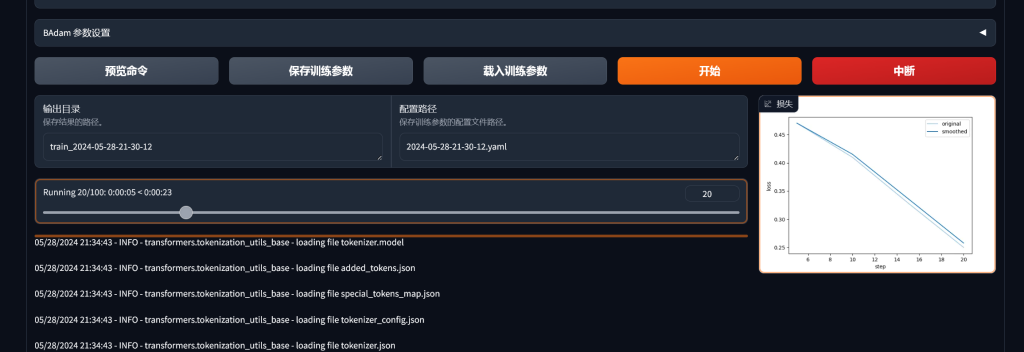
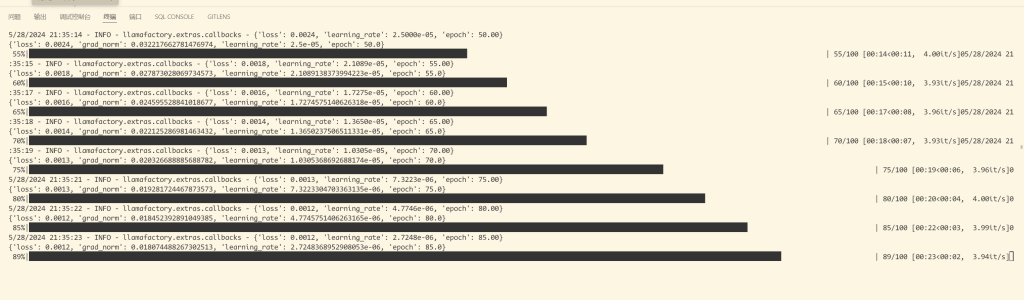
可以在网页和控制台上看到训练进度,直至最后训练完成。
测试训练结果
训练完成后,结果会到适配器中,点击Chat菜单,进入聊天界面,点击加载模型测试训练结果:
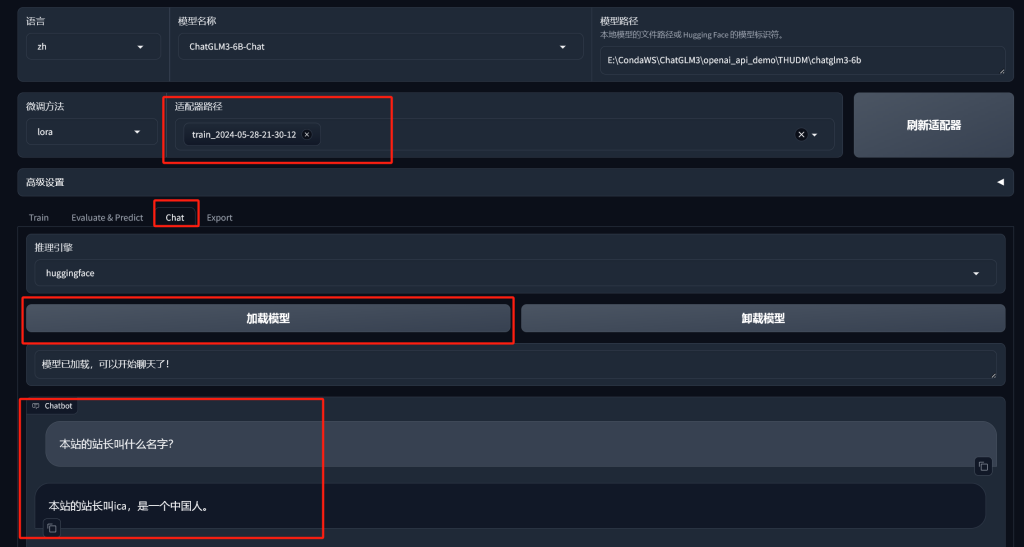
可以看到,这句话已经训练到模型中了。
导出模型
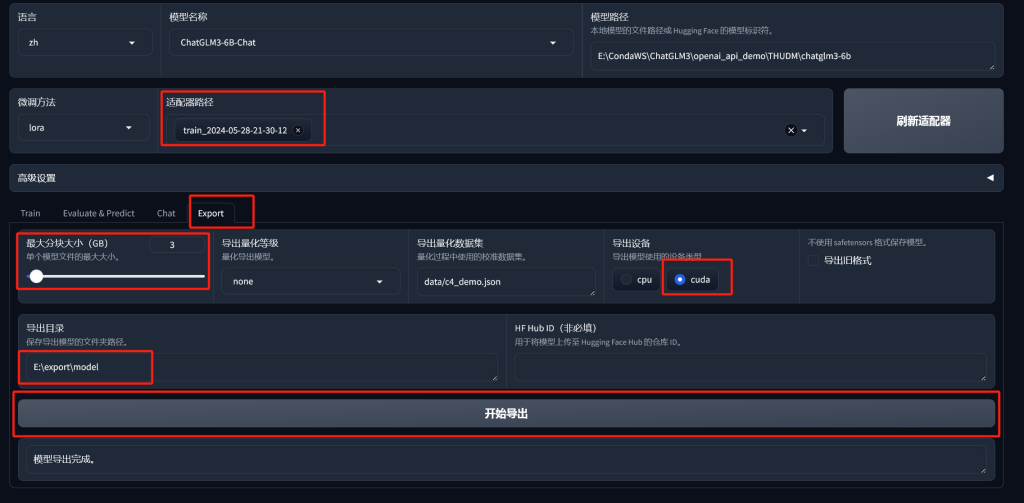
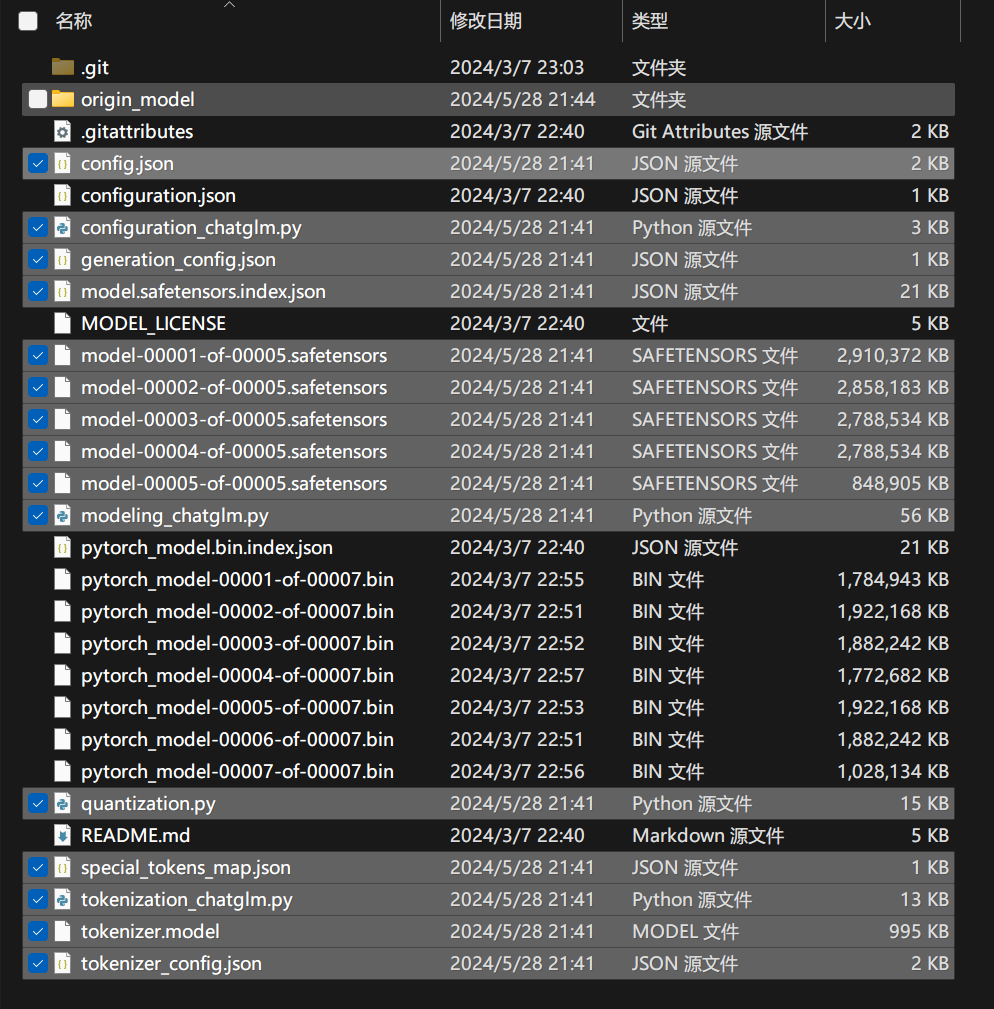
选择Explort菜单,选择训练的适配器,设置好最大分块大小,我设置3G,导出设备有cuda那么就用cuda快,导出目录设定好,点击开始导出,很快就结束了,得到目录中的文件。
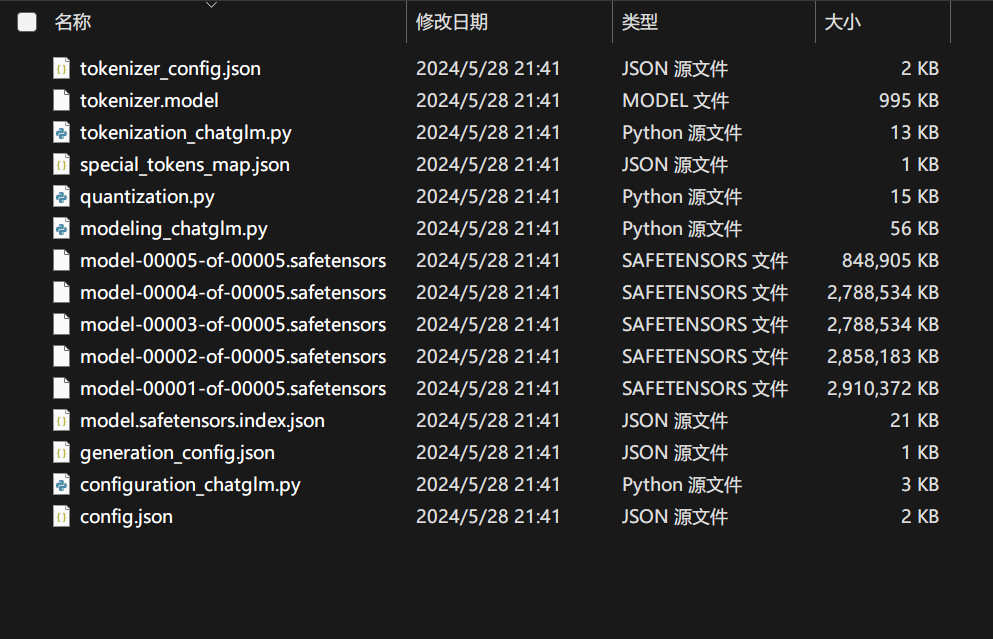
将这些文件添加覆盖到源模型中,就可以跑训练后的数据了
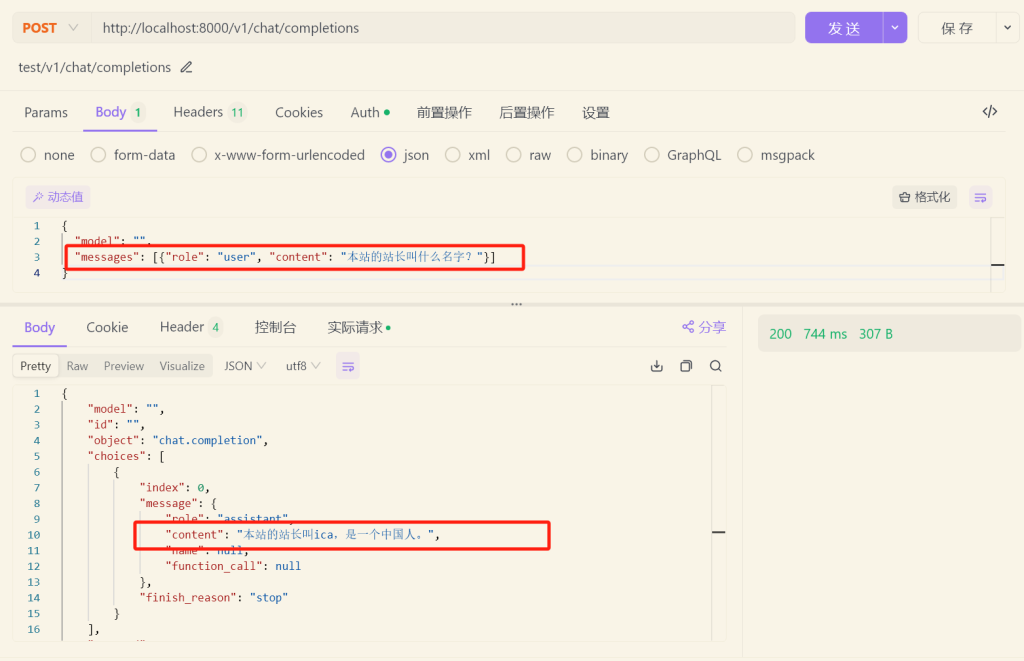
训练结果是显而易见的。